I am happy to let you know that my blog, even though its at its early stages of development, has just been listed at Edublogs Directories.
Edublogs.org is a community with 1.5 million members that consists of teachers, students, and bloggers from all over the world, all of who are using blogs in some way or another in their classrooms and/or in the education field.
Edublogs.org, I thank you deeply from my heart for the opportunity to be part of this great community.
Blog you later!
Marco Cesar Saenz
Using Web Tools in the Classroom
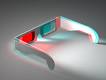
Today I came upon an inreresting blog by Mr. Byrne at Free Technology for Teachers (http://www.freetech4teachers.com), that talked about Mars 3D (http://mars.jpl.nasa.gov/mars3d/index.cfm), a NASA website that features a gallery of images of Mars that can be viewed with 3D glasses and give the effect of tridimensional space.
The way these images simulate 3D, as explained by this Website, is by superimposing the same image twice - one that is cyan, or blue, colored and another one that is red colored - over a flat 2D picture background. Since the 3D glasses that they tell you to use have two cellophane 'lenses', one colored red and the other blue, the blue part of the 3D image will, thus, not be seen by the eye looking through the blue cellophane. Likewise, the eye looking through the red cellophane will not see the red parts of the image. By the way, some of you old enough may remember that this is how they used to make 3D movies in the old days.
How does this create a 3D effect, you may ask. Well, each of our eyes see in 2D, and it is not until the brain merges and analyzes the image gathered by each eye, and takes into account how much each element in each image is distant from the same element in the other image when compared to the background, that the brain interprets what items are nearer or farther. The farther the object the closer its position is in both images and, viceversa, the closer the object the more difference in placement in both images.
Let me try to exemplify this for you. Do this for me, place your index finger, pointing upward, about 3 inches away from your nose. Close each eye one at a time and you will see your finger appears to move left to right. Now, place your finger at arms-lenght. Close your eyes one at a time, one after the other. You will notice that the finger left-to-right movement is almost null. This is how your brain interprets how far or close are the objects and also how far they go in depth.
Pretty cool, huh? Well, I was thinking right now, why do kids have to settle with the images provided by third parties. Showing the kids the images from Mars is a great start, but why not also have them do their own 3D images? I'm sure it will be very interesting to see what they can come up with. All you need to do, is have them use a photo editor program. There are free programs very similar to Adobe's Photoshop, such as Paint.NET or GIMPS, that you can easily download and install to use for this activity.
Once you have your photo editor program installed, have the students add a picture to the background layer and turn it to gray color. This will be your stage. Have them insert another layer and add a cut-out image of an object on this layer. How to do this is out of the scope of this post, but there are thousands of tutorials on the Internet on how to do this in any program. Also there is one easy to follow tutorial at the Mars 3D site.
Then, this layer with the cut-out object needs to be duplicated and both layers need to be made semi-transparent and blurred, so that, as a result you will end up with a total of three layers. Change one of the cut-out object's channels to blue and green and the other one to red. Get hold of a pair of 3D glasses, or make your own by following the instructions at http://mars.jpl.nasa.gov/mars3d/3DGlasses.cfm, put them on, and drag one of the two objects appart from the other. The farther appart that you drag onefrom theother, the nearer the object will appear to be. Play with different percentages of layer transparency until you get the best effect.
You think that was fun? Why not trying inserting more than one different object that way you could have some sticking out farther than the others? See? The possibilities are endless! You can have the students create three-dimensional family portraits, comics, animations, presentations, etcetera!
I saw this interesting site today, it is calked Fakebook, it is the facebook of fake famous historical profiles and it's geared toward education. Students can create and update profiles of their favorite historical figures, decide who they are friends with, what comments and posts to add, and what pictures to upload.
It would be interesting if each student created a fakebook profile for people who lived around the same time and who were in someway or another affected by each other.
The link below displays a showcase of the best examples of student created fakebook profiles.
I wanted to share these three videos that show how to use Windows Movie Maker. They are a series of tutorials that were created by the same person and could be used for students to get a clear understanding of how to use Windows Movie Maker.
Windows Live Movie Maker 2011 & Youtube PART 1 of 3
Windows Live Movie Maker 2011 & Youtube PART 1 of 3
Windows Live Movie Maker 2011 & Youtube PART 3 of 3
I teach Computer Science in a Christian school. This year I'll be working with the bible teacher of my 7th and 8th grade computer class and will have the students work on a project where they will create a movie clip that explains a bible verse of their choosing.
To help the students understand what is expected and what they can create, I have accumulated a list of around 20 videos that offer different approaches to explaining a topic and I've been playing for the students one or two videos a day during the last 2 weeks prior to starting the project. The videos that I showcase are downloaded from (http://GodTube.com), a site which I have found has an enormous quantity of Cristian related videos, and they cover different video-making approaches such as comedy, testimonial, animated lyrics and songs, animations, reenactments, animated words, filmed hand written messages, etcetera. Now, just because I get my videos from doesn't mean this lesson can not apply for secular classrooms too. Students and/or teacher can utilize other video sites such as Youtube.com or Vimeo.com, among many others to find examples of what students can do.
Here my three favorite videos. I've found 7th and 8th graders enjoy these a lot:
For this lesson plan we are using digital cameras to film and Microsoft's VideoMaker software to format the movie. I've found MovieMaker to be very easy to use and simple, and all though it may not have very complex effects, the results are professional looking.
Movie Making Lesson Plan Summary: Students will learn how to import pictures and edit their movie with effects, transitions and titles.
Learning Objectives:
"Plan a storyboard by sketching each scene
"Work cooperatively in a production team
"Use a camera to capture a variety of action shots
"Identify basic parts of Windows Movie Maker
"Isolate a frame by clicking and dragging the play head
"Split a clip into two pieces and delete frames
"Edit clips to add transitions, effects, and text overlays
"Add a title clip and a credit clip
"Narrate action sequences and add sound track
"Save a project as a Windows Media Player file
Part I Warmup activity:
Introduce and teach the basics of Microsoft's MovieMaker tool.
Planning:
Once the students are familiar with Microsoft Movie Maker, they begin to plan the creation of their own video production. To start, students are grouped in teams of six and together, the video production team, must decide on a topic from a bible verse and the plot for their movie.
Part II Organizing:
Students will decide the roles for the team members:
Director/Sound Editor (1 student)
Writers/Photographers (2 student)
Story Board/Cast (3 Students)
Note: if the group is too small for groups of six, teams can be arranged with three students and, while still one student is the director and the other two are writers, all three students participate in the making of the story board and as cast.
Writing:
[Writers and Story Board team members]
Students develop story line on their Topic of choice (5-8 dialogs). Story board crew use a storyboard, provided with the project, to organize their ideas (5-8 frames)
Part III Filming Movie:
[Director , Photographers, and Cast members]
Students capture the action sequences using basic video recording equipment, such as a web cam or a digital camera.
Part IV Sound Capture:
[Sound Editor, and Cast members]
Students will work with sound and background music. Either they will record themselves (if necessary and if if a recorder is available, normally they will use the recorded audio from the digital camera) and/or using speech to text application, and will also add background music and effects
Editing:
[Sound Editor, Photographer, and Cast members]
Students will import the photos/videos/Recordings/Sound into the movie, and edit it as needed.
Part V Editing:
[Sound Editor, Photographer, and Cast members]
Students will import the photos/videos/Recordings/Sound into the movie, and edit it as needed.
Attachements
Movie Maker Team and Project Evaluation Rubric
Director’s Name: ________________________
Student’s Name: _________________________
Evaluating My Team Members
Criteria
Points
4
3
2
1
Level Of Engagement In Project
Student proactively contributes to team or project by offering ideas and asking questions more than once per class.
Student proactively contributes to team or project by offering ideas and asking questions once per class.
Student rarely contributes to team or project by offering ideas and asking questions.
Student never contributes to team or project by offering ideas and asking questions
a.
b.
c.
d.
e.
Listening Skills
Student listens when others talk, both in groups and in class. Student incorporates or builds off of the ideas of others.
Student listens when others talk, both in groups and in class.
Student does not listen when others talk, both in groups and in class.
Student does not listen when others talk, both in groups and in class.Student often interrupts when others speak.
a.
b.
c.
d.
e.
Behavior
Student almost never displays disruptive behavior during class.
Student rarely displays disruptive behavior during class.
Student occasionally displays disruptive behavior during class.
Student almost always displays disruptive behavior during class.
a.
b.
c.
d.
e.
Write your Team Members’ Name next to a letter for grading
a.
Total---->
a.
b.
b.
c.
c.
d.
d.
e.
e.
Evaluating My Director
Criteria
Points
Below Average
Satisfactory
Excellent
Had a clear vision of final product
1
2
3
Properly organized to complete project
1
2
3
Managed time wisely
1
2
3
Managed people wisely
1
2
3
Managed resources wisely
1
2
3
Communicated with team members and teacher
1
2
3
Total---->
Evaluating The Other Team’s Project
Criteria
Points
Below Average
Satisfactory
Excellent
Format
1
2
3
Mechanics of speaking/writing
1
2
3
Organization and structure – Story Flow: Sequential and Cohesive (logical)
1
2
3
Organization and structure – Introduction: Strong opening leading smoothly to story development
1
2
3
Creativity
1
2
3
Demonstrates knowledge
1
2
3
All graphics are relevant to topic
1
2
3
Graphics appear long enough to make their point, but not too long
1
2
3
All transitions and effects enhance pictures and augment the flow of the movie
1
2
3
Contrast: Good contrast between text and background; easy to see
1
2
3
Font: Readable font; appropriate for subject
1
2
3
Animation: Title animations are artistic and add interest
1
2
3
Title: Titles are visible for an appropriate amount of time
1
2
3
Total---->
Image 1 - Retrieved from http://www.internaldrive.com/courses-programs/id-tech-summer-computer-camps/kids-movie-making-summer-camp/ on November 29, 2012.